Friday, November 26, 2010

The lift gate was too short to hold the crate and other moving adventures

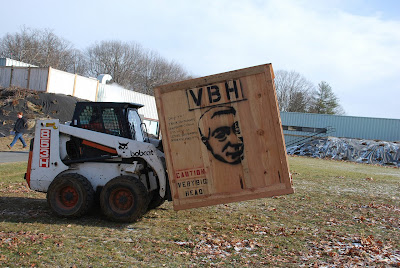
The series of photographs below show the delivery and assembly of the two casts of the VBH. This did not happen all at once but other the course of about a month. The first photo below was about a month ago when the first crate arrived. It shows the 6'x6' crate sitting as far out on the lift gate as it would go without falling off. This was during thanksgiving break so there was only one other person in the Art Barn who could come out to help the truck driver and I move the crate off of the truck. This was done by having the truck driver and my friend from the Art Barn hold up the back end of the crate so it wouldn't topple off the lift gate while I lowered the lift gate down onto the ground. I was very worried that the crate would fall and crush them, but we managed it would injury.

Also the graphics on the outside of the crates was a complete surprise to me. My father had added those onto the crates before shipping them off. It was very amusing to see the stencil of the VBH and the 'warning' on the outside of the crates. It made the crate a sort of art piece in and of themselves which I loved.
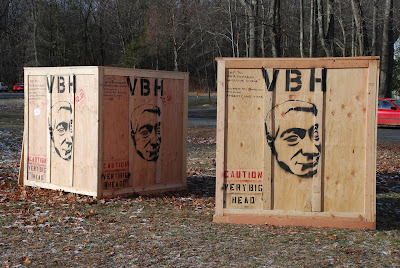
For the arrival of the second crate I asked the moving company to bring two movers to help get the crate off the truck. Only later did I discover that the College's Physical Plant owns a fork lift and so I asked them to move the crates away from the road where one was block parking space and onto the grass.

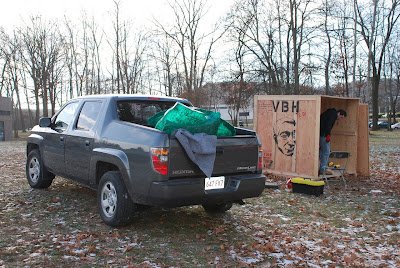
The last three pictures here are of the Five College Movers that I hired to help me moved the pieces of the VBH's out of the crates, into the gallery, and then assemble them. With their truck and my car we were able to transport the pieces across campus in just a few trips.

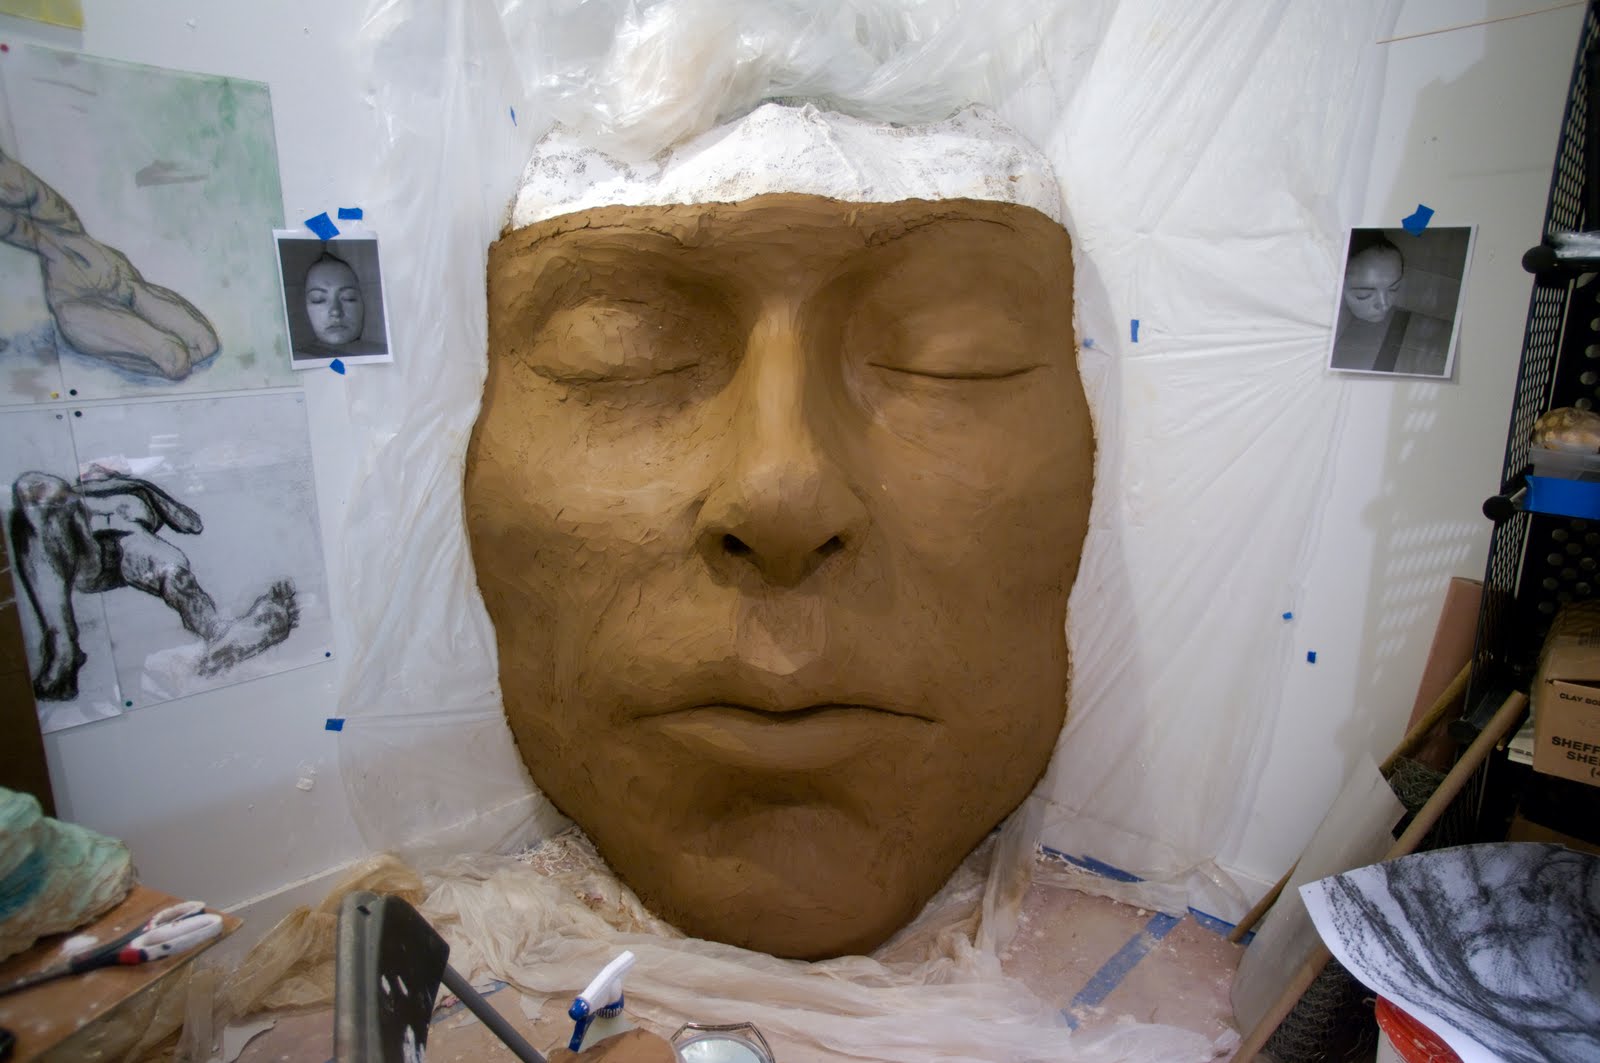
This last picture is hilarious. It shows one of the movers adding bolts between two of the pieces of the cast to hold it together. We had to wear heavy gloves when working with the cast pieces because the edges and the inside of the pieces had exposed fiberglass and we didn't want to cut our hands. After he had bolted in the last panel of that VBH he was stuck inside and we had to lift up the sculpture to let him crawl out.

My Back Hurts

From bottom to top I have a series of photos here that show me breaking away the mold pieces from the VBF. This task took more then the 11 hours it took to mold the sculpture, but I did not count. The final photograph directly below is my absolute favorite so far. It show the ten pieces of the mold sitting against the wall where the VBF used to me and my feet in the foreground showing the plaster and dirt on my pants and shoes from all of the hard work. It was very satisfying.


Monday, November 22, 2010

11 hours of mould making

In the same way that I made the waste mold for the smiling head I made the piece mold for the VBF. It started at the bottom with dividing the sculpture into pieces with shim walls, then adding a couple of layers of plaster, then adding burlap and wooden supports. I did not add a layer of slip brush strokes because I want to leave the mold in tact so there is no reason for me to want to separate the burlap layer from the plaster layer. The entire process took 11 hours, much longer then the smiling head, because the scale of the piece added to the time and the labor.


Sunday, November 21, 2010

VBF final clay piece

Here I have taken three photos, from oldest to newest, of the final stages of modeling. the photo directly below is the final shape of the VBF. Again you can see the photos I have taken of myself to help guide the sculpting. I decided to cut the face off right above the eyebrows for a number of reasons. Ideally if I had had move time I would have made the piece mold of the sculpture the way it is and then continued to add clay to build up the forehead and then make a second piece mold so that I could experiment with two variations.


Monday, November 15, 2010

VBF and studio shot

In the photo below I tried to get as much of my studio space into the frame as possible. As you can see the space is about a third the size of the studio I had this summer and it is getting a bit crowded. I cast and broke out the smiling face from the mold that I posted about a bit ago. Now it is shellacked and spray painted blue to go with the aquatic theme, which relates to the model's major as a maine bioligist. The photo also give an idea of the scale of the VBF. I have added about three quarters of the clay now and I've started shaping it onto general features. To the immediate right of the VBF you can see a photograph I tok of myself with my head fitted into a box to give the same illusion that it is sitting in a corner. Lastly there are five drawings that are visible on the back wall of the studio that I have started working with. I wanted to reserve the charcoal figure drawings to I fitted a piece of plexiglass on top of each and now I am experimenting with paint on top of the plexi.

VBH: Clean and Ready to Ship

The last thing the caster did was to clean the pieces of any remaining clay, sand down the sharp edges where the fiberglass was sticking out, and build a giant 6'x6' crate. In the images below there are no longer the dark lines at the seems and the whole thing looks frosty and fresh.
In the image below you can notice that the caster cut a u-shape out of the wooden stand the sculpture is sitting on. He did this so that when the mold pieces were all bolted together he could crawl under the head and inside of it to add the layers of resin. I was against this idea, suggesting that he leave on of the pieces off to give himself more air while working with such toxic material, but working with the closed piece gave it the tightest alignment. It looks amazing and I can wait to receive it in Massachusetts.

Tuesday, November 9, 2010

The VBH revealed

After deciding to go with expoy resin (for the sake of the neighbors we chose the product that would have the least toxic smell) and choosing a sample that was the perfect color and translucency the first cast was made! I wanted the resin to be a pale blue that light coud be visible though, like ice.
The final presentation won't have such dramatically dark line the way that the sculpture has in these photographs. These are photographs of the cast right after the pieces of the mold have been removed, so the aluminum shims are still sitting in the seem lines causing them to have a dark outline.

Monday, November 8, 2010

New Project. . . The VBF


I'm building an armature for a new and final project that is a large face. I am using a combination of chicken, dow board, spray foam, burlap, and plaster as I learn to do from the VBH armature. I will cast it with a piece mold and then display in vertical sections. I am modeling for myself for this piece, so it will be a kind of self portrait. Since it is similar to the VBH that started this body of work I have decided to call it the Very Big Face or VBF. This will be the last large project I build before my Div III show in December.